Don't forget to visit my Etsy shop to see more of my work!

Wednesday, November 15, 2017

A Little Behind...

So my blog has been effected by a snowball. My snowball, to be precise. This snowball started as a tiny little snowflake- I let this little snowflake blow past me when I did a Kiwi Lane project over a year ago and forgot to post it to my blog after I submitted it to KLD. It seemed like no big deal to let it slide until the next project.... so I put it off. And then the next project came and went and I didn't have time to post both, so I put it off again. You know, just until I had more of that precious commodity- TIME. So the snowflake turned into a snowball. And the next project was submitted, but not posted to my blog... and so on. You see where this is going? That little snowball is now rolling down a large hill and rapidly growing. In fact, I'm not going to be able to catch up to that snowball. Instead, I'm going to catch the next snowflake and post the next project. Sure, I might be able to chase after the mega-snowball and grab a handful, but once again I'm lacking in that all too precious TIME department. If you're super curious and don't want to wait to see what I've been making, feel free to head over to the Kiwi Lane Designs blog and scroll through previous posts. Otherwise, feel free to wait and see if I can catch some snowflakes.

Thanks for stopping by and Happy Scrapping!

Wednesday, May 11, 2016

Using Stamps with your Kiwi Lane Templates


Howdy! I'm here today with a few tips for using stamps with your Kiwi Lane Designs templates.

I know you’ve seen all the cute cards, pages and projects over the years with stamped sentiments, titles, journaling spots or other images. But, have you ever wondered what the process would be to use your stamp stash with your templates? While we all have a little bit of our own spin to the process, I’m going to share a few tips and tricks to help you create your own stamped template shapes.

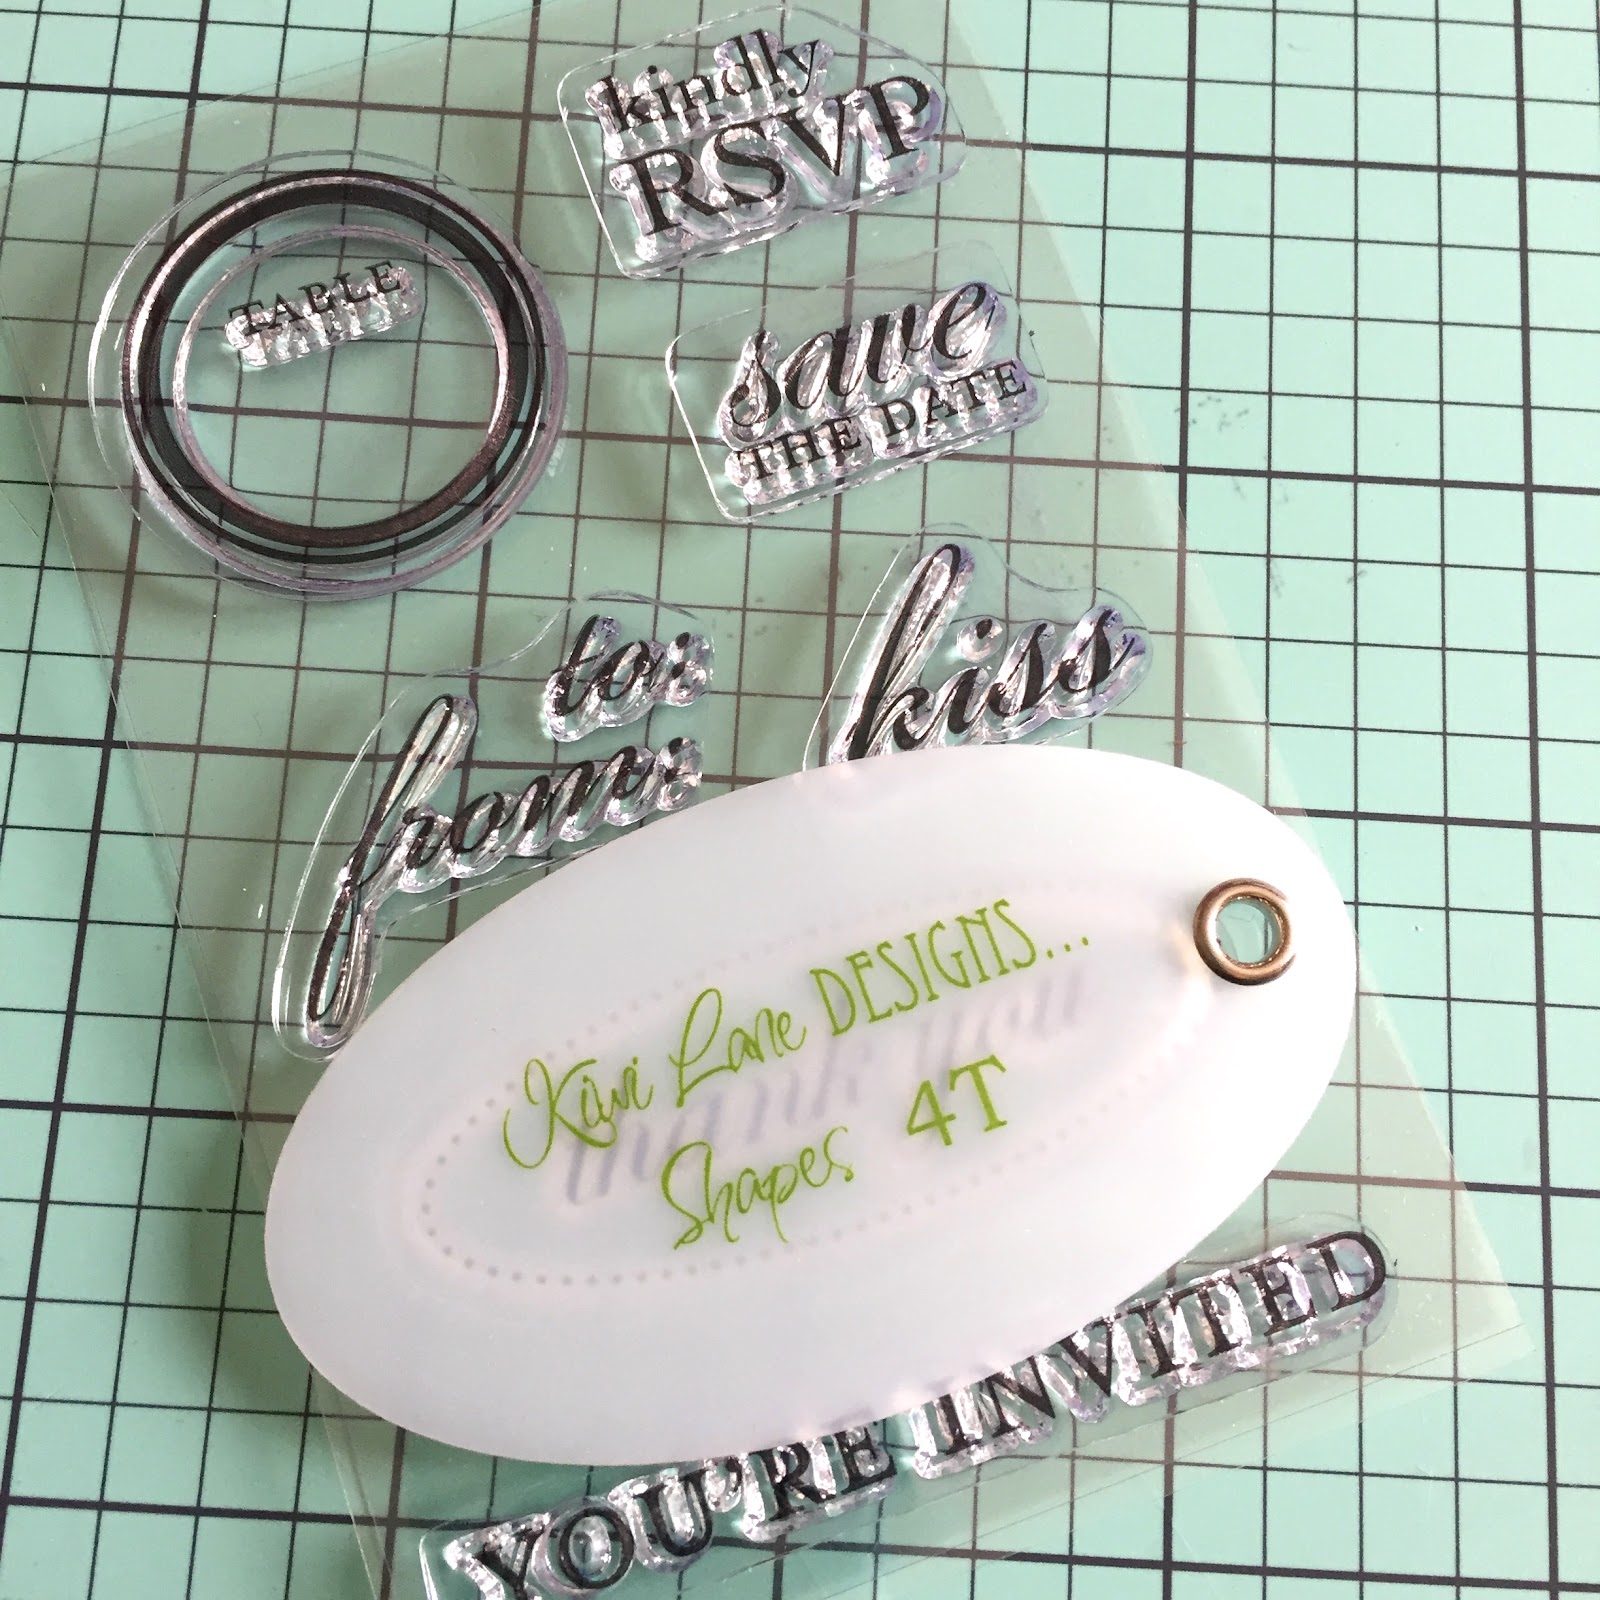
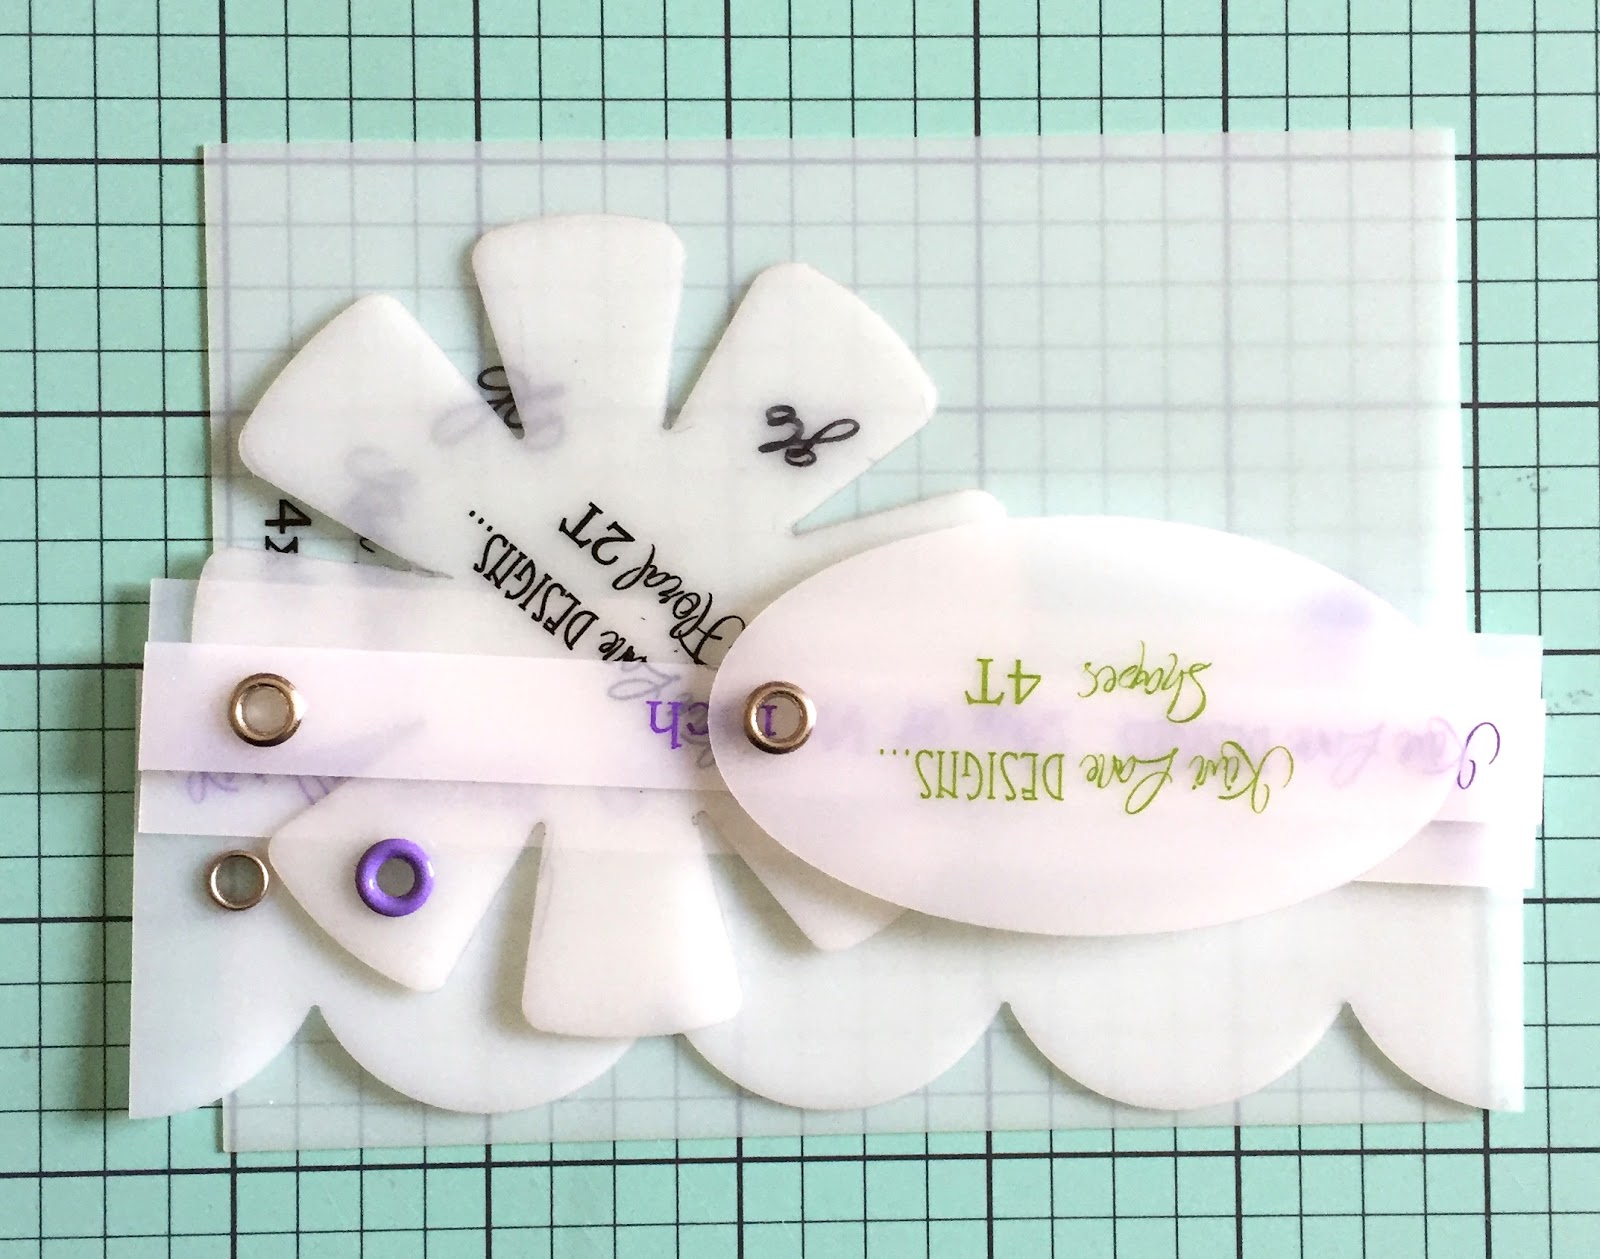
The first step (and the most time consuming) is matching a stamp and a template shape. This is where the translucent property of the templates comes in handy. You can place your template directly over the stamp to see if it’ll fit, like this:
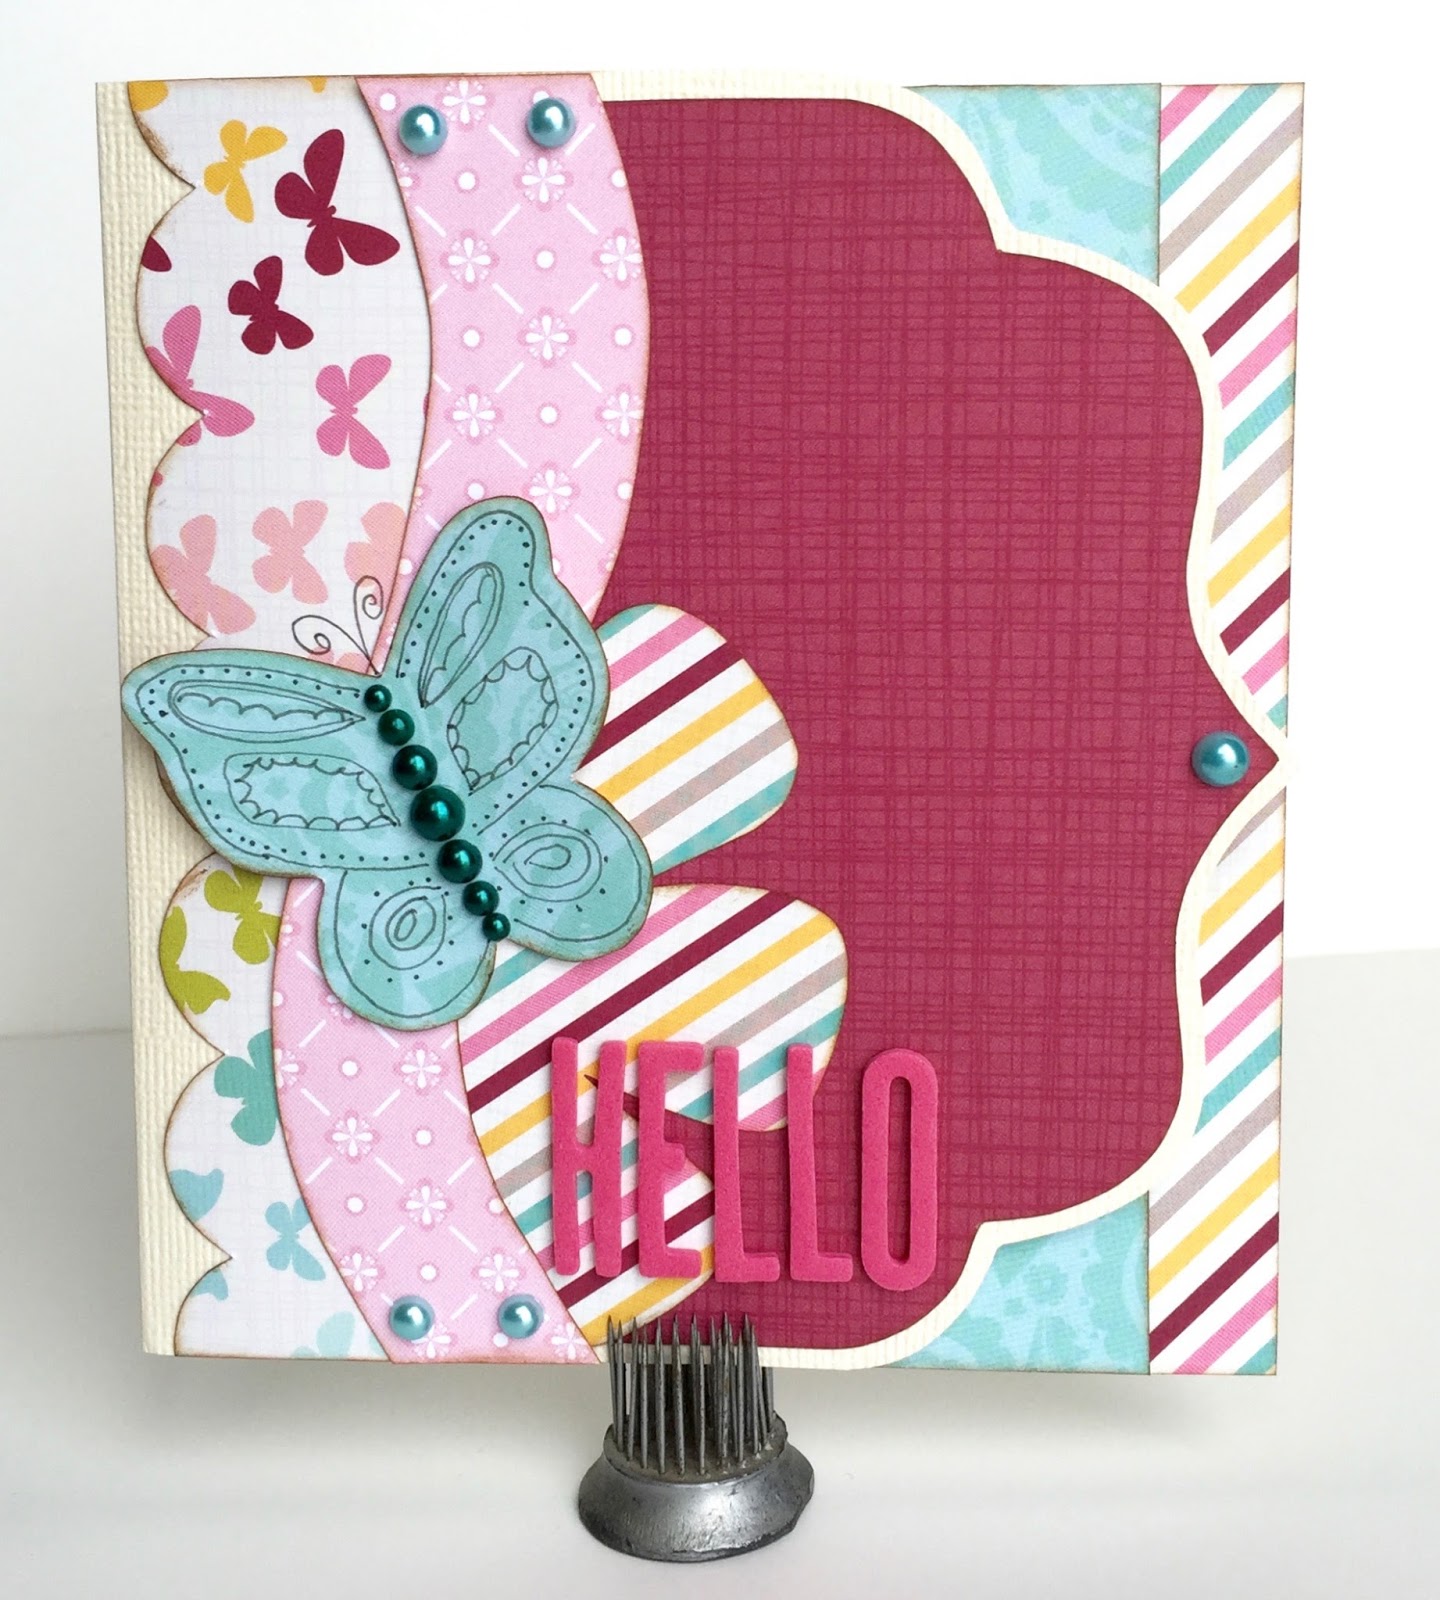
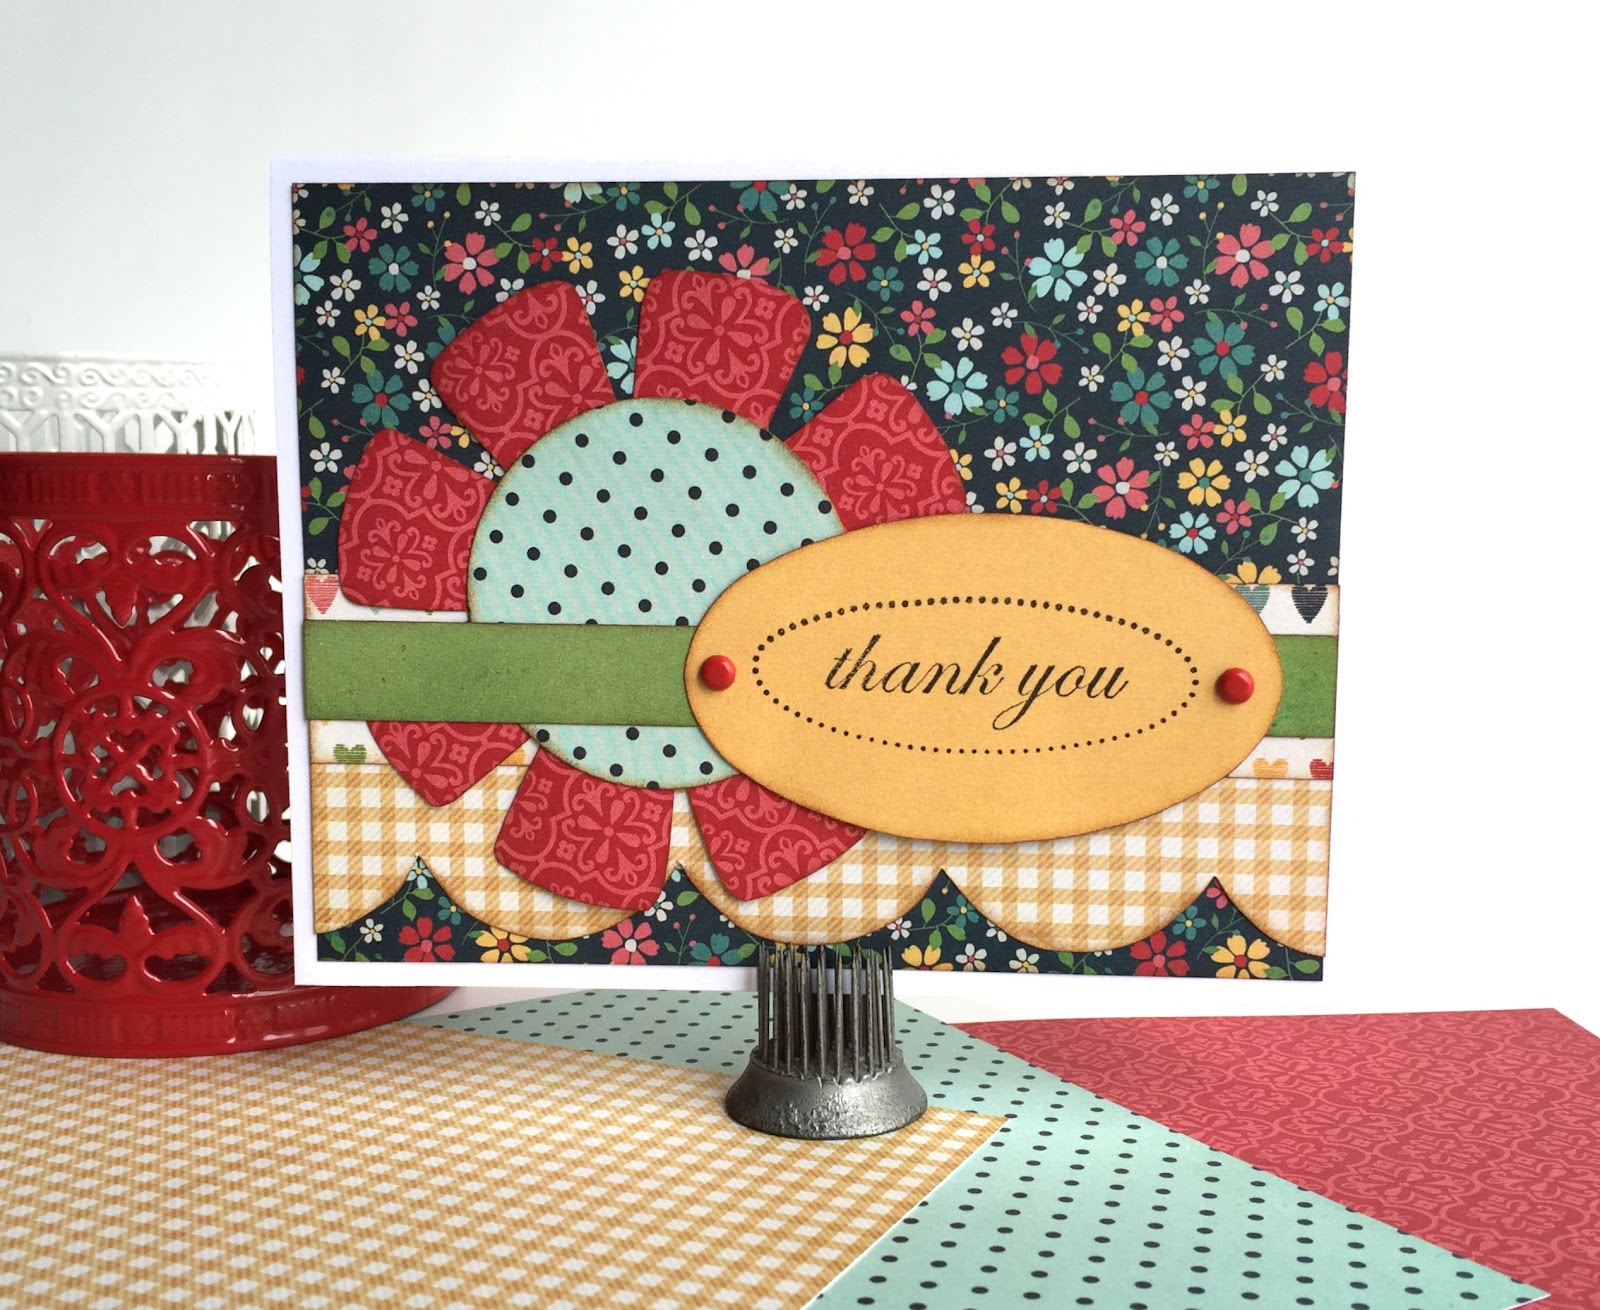
Once you have your template matched with a stamp, you can start Playing to Create using your Kiwi Lane templates. Here’s my framed card:
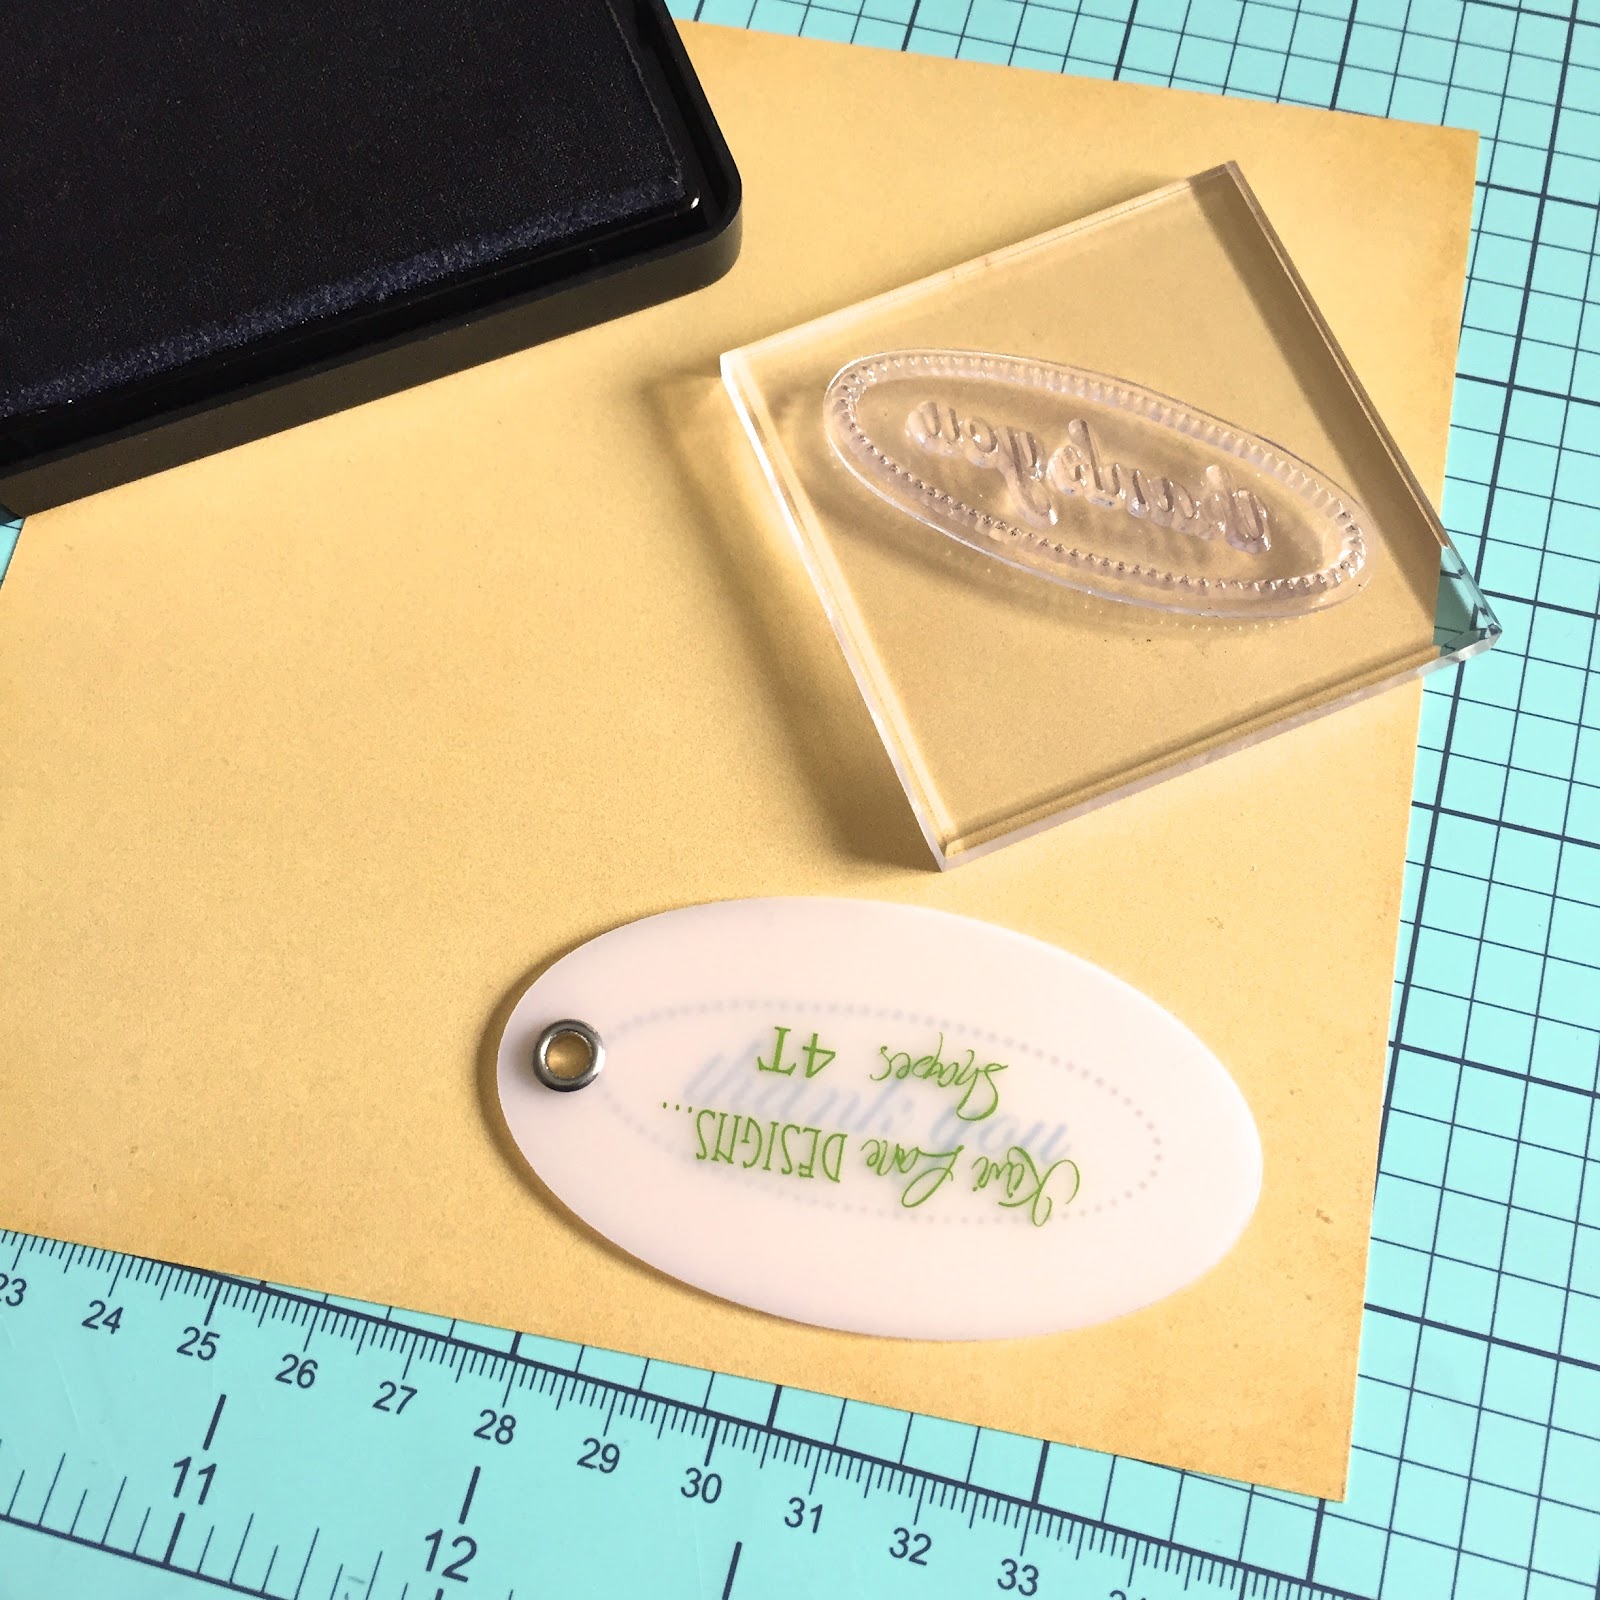
To get a perfectly centered stamped image, first stamp the image on your paper. Make sure you leave enough space around the image to accommodate the template you want to use. Once your stamped image is dry, place the template over the image (again- the awesome translucent property at work!) and trace like so:
Next, cut out your shape:
And now you’ll continue building your card as you normally would- tracing, cutting, inking and adhering- until you have your finished card:
Here are a couple more cards that I made using the same process: 
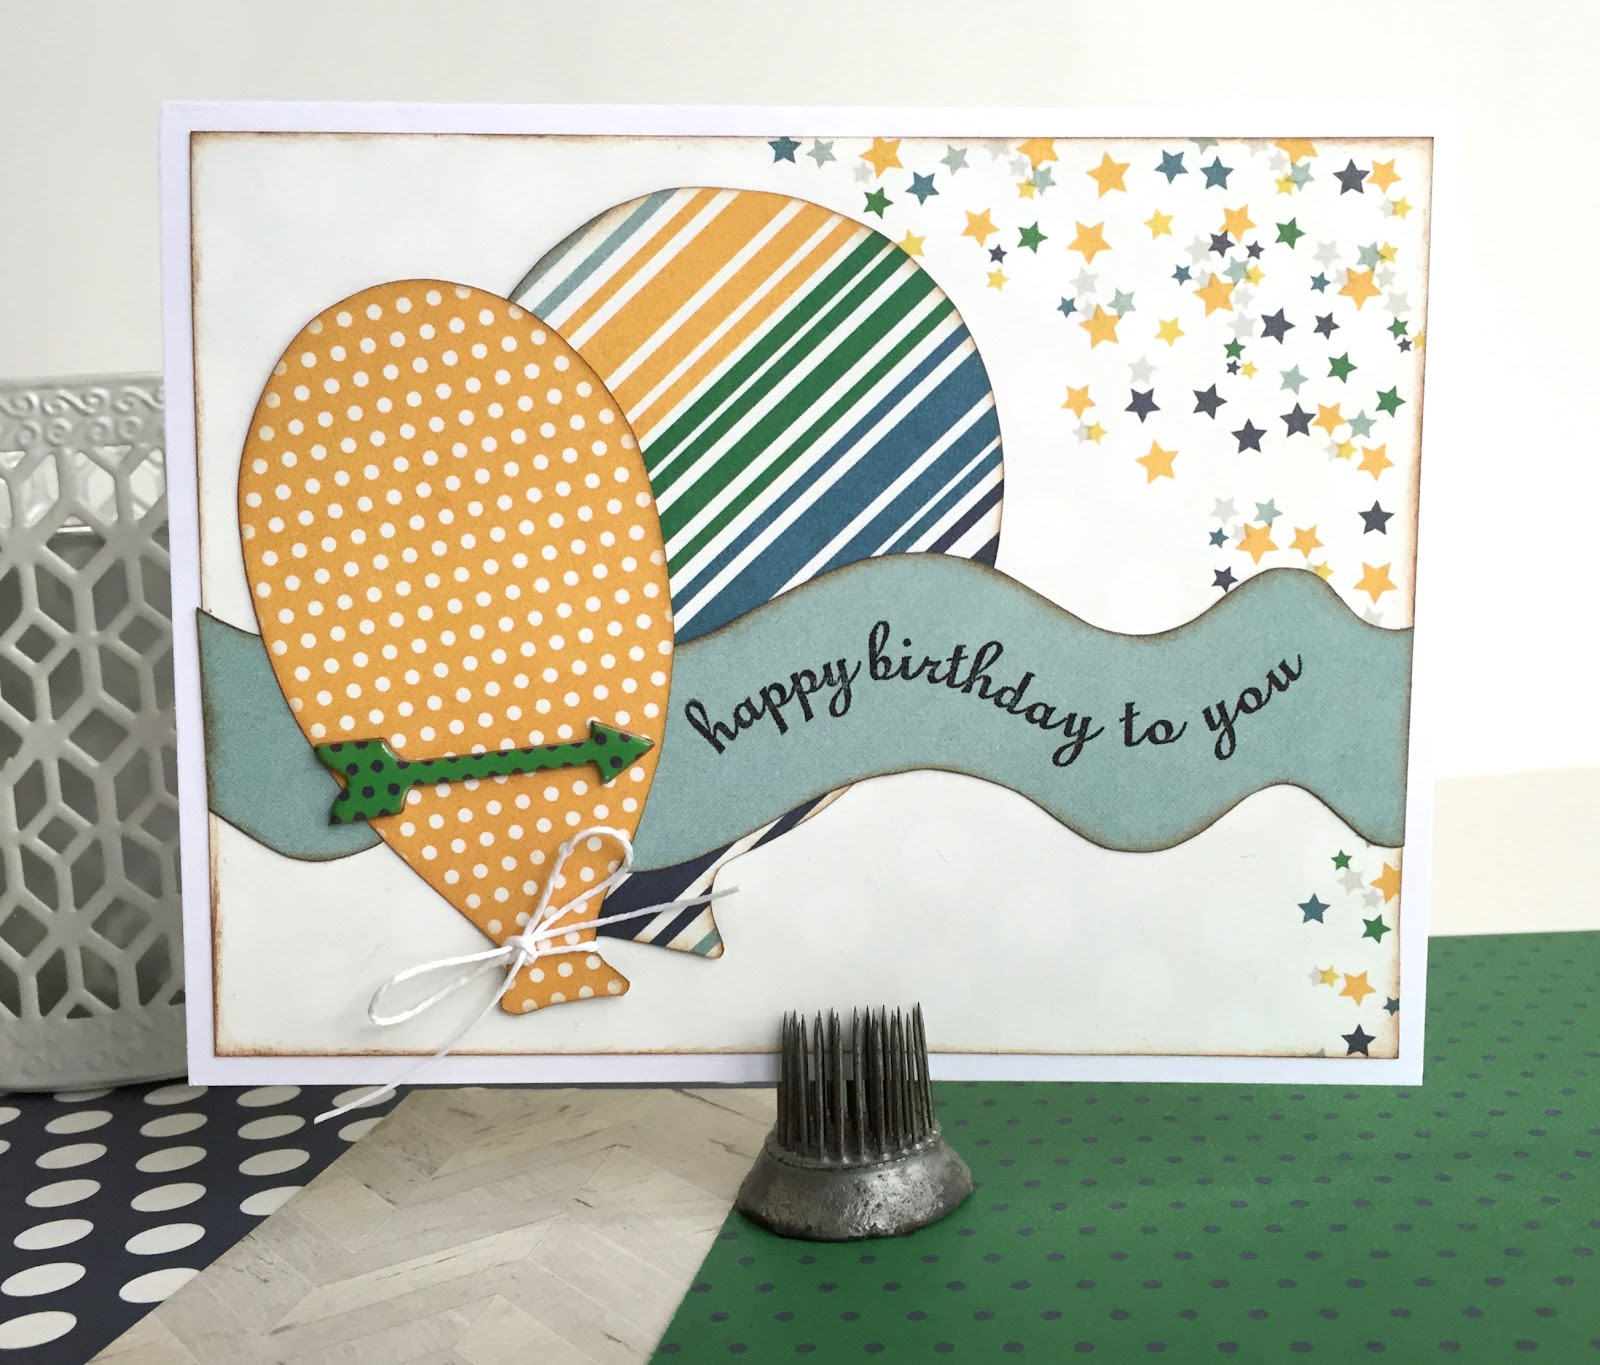
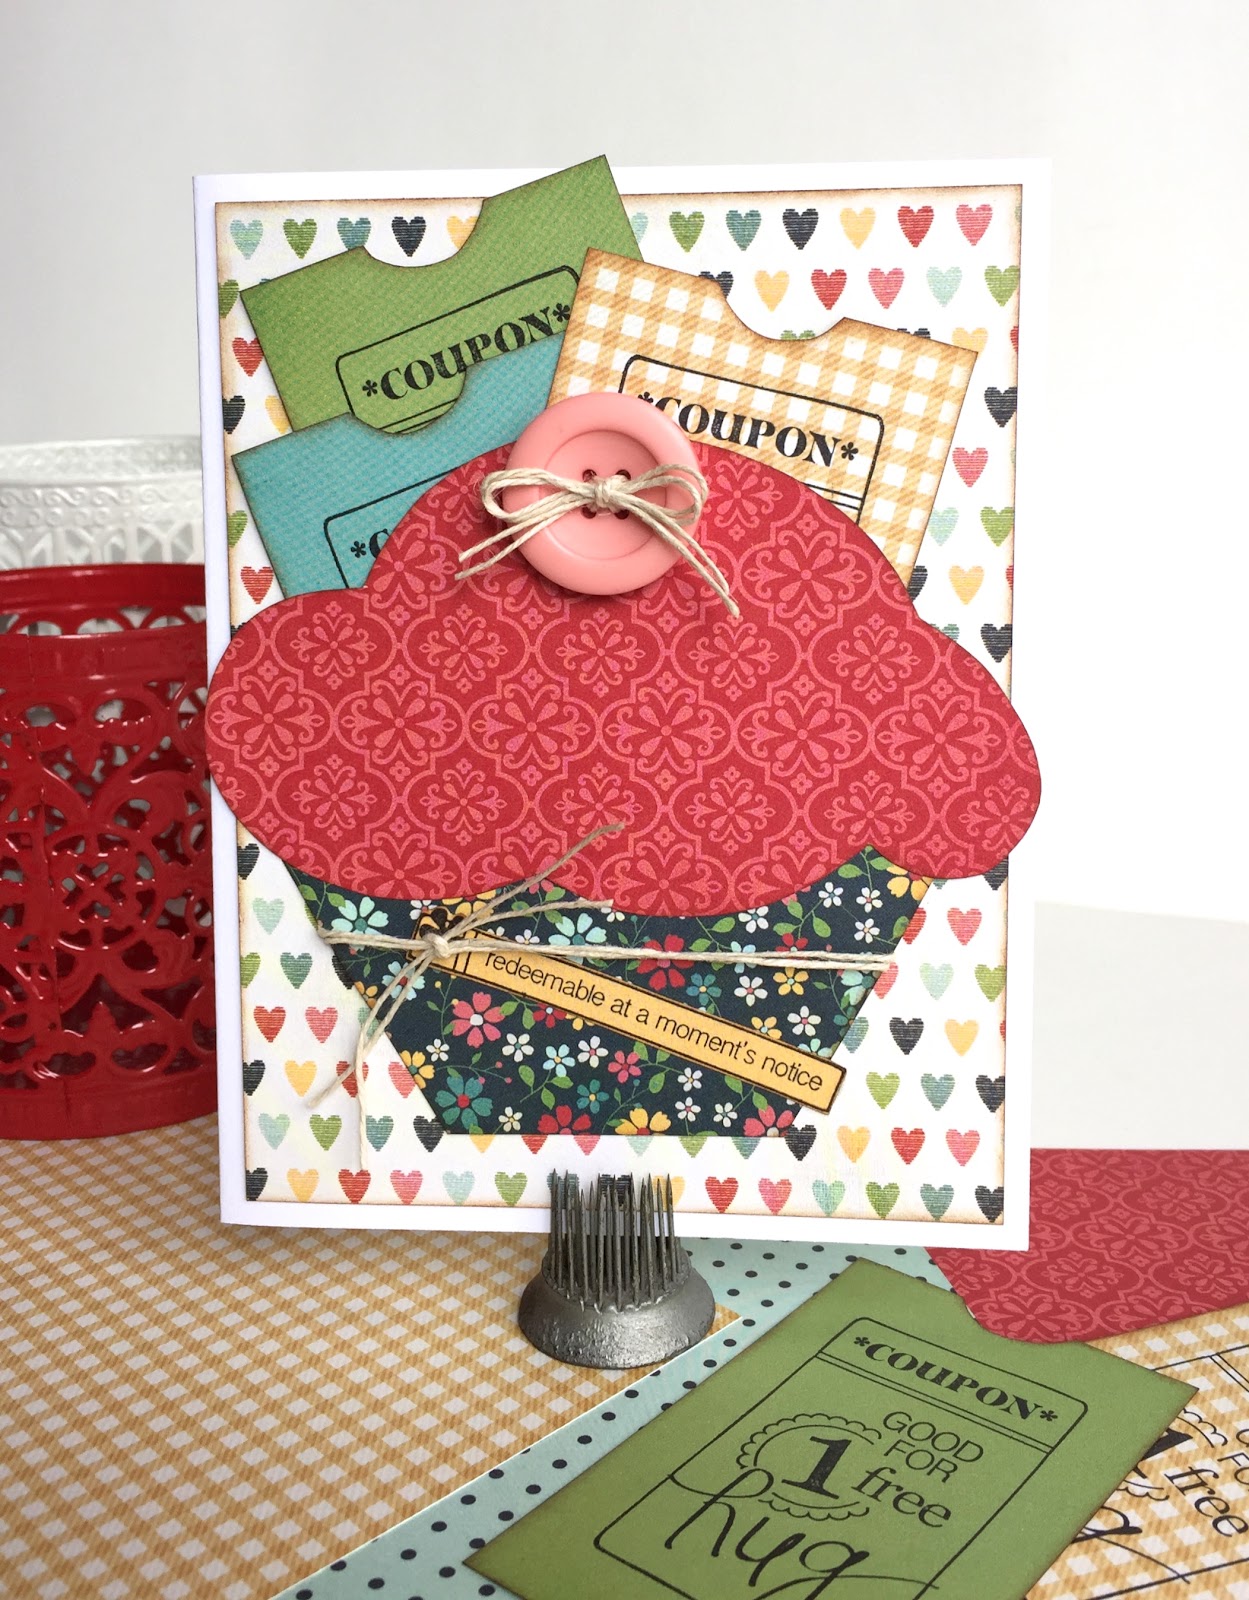
And a quick note- the stamped tickets on the cupcake card are removable coupons for hugs- how cute!!

I hope this little tutorial helped! Now you can work some stamping into your projects when you use your Kiwi Lane templates and the Play to Create System!!

Do you use stamps in your scrapbooking? Have you already begun combining stamps and Designer Templates? If so, please share in the comments section below!

Templates used:
Celebrate 2,3,5
Tiny Celebrate 2T
Delight 3
Tiny Shapes 4T,6T
Tiny Floral 2T
Card Strips

All paper is Simple Stories. Stamps by Making Memories, Studio G, 3 Bugs in a Rug.

Tuesday, May 10, 2016

Scrap Your Stash Using Kiwi Lane Designs!

If you're anything like me, you have approximately 245,000 sheets of scrapbooking paper in your stash, give or take a few sheets. Well, it seems like that many. And most of it is old. Really old. My goal lately has been to use up those partial collections that I have left in my stash. But every once in a while, I come across a full collection that I had been hanging onto. Such as the "Laurel" collection from Scenic Route. The collection was released in 2006 and I'm almost positive I bought it as soon as it came out. Which means it's been in my stash for about 10 years. It's about time it saw some action, right? Well, here's the photo-ready layout I made using my Kiwi Lane templates:


Along with the older paper, I also used brads from My Mind's Eye collections that were released at least 3 years ago, Doodlebug paper frills that are at least 9 years old, and Bazzill flowers that I've had for at least 8 years. Wow. I'm more of a supply hoarder than I thought!!

It's fun to buy new stuff, and I'd never ask you to give up the joy of shopping for new paper, but remember what you already have and use your Kiwi Lane Designs templates to breathe new life into your old paper!

Templates I used:
Abbie Road 3A,3B
Scallops 1A,1B
Madison Avenue 2A,2B
Tiny Wildflowers 1T,4T
Nature 1
Tiny Nature 1T
Tiny Brackets 4T
Wacky 2
12" Strips
Photos

**Love this layout? You can own it! Head over to my Etsy shop to purchase it- but hurry! It's one of a kind and won't last long!**

Thursday, March 3, 2016

Clovers with Kiwi Lane Designs

March is the month of shamrocks and four leaf clovers. As I was thinking about projects I would like to work on this month, I realized that there weren't any shamrock or four leaf clover shapes in any of my Designer Template sets. I took this as a challenge and decided that I would step outside of the box with my Kiwi Lane Templates, and figure out a way to alter some of the other templates to make my own clover shapes.

Let me share with you how I made three, yes THREE, four leaf clovers with my templates. And then read on to see how I turned those four leaf clovers into three leaf clovers.

For the largest clover, you will want to use the heart in the Tiny Sweetheart set (2T). Trace it four times, overlapping the points like this:


Next, erase the lines that you don't want. A lot of us go into autopilot when we are cutting things out, and it would be really easy to accidentally follow the wrong lines, if you don’t erase them before hand!


Finally, cut it out and you have your first four leaf clover!

For the medium clover, you will use the four-petaled flower shape from the
Springtime Accessory set (5), along with the flower in your
Sweetheart Accessory set (3).


Step 1: Trace the Springtime flower.
Steps 2 & 3: Trace the indent of the Sweetheart flower onto the edge of each of the petals of the Springtime flower.
Step 4: Erase the lines that you don't want.

Cut it out and you have your second four leaf clover!

For the smallest clover, I used the flower shape from my Tiny Sweetheart
Accessory set (3T).


Step 1: Trace your flower.
Steps 2 & 3: Divide and cut your flower into heart/petal shapes as shown.**
Step 4: Use four of those heart/petal shapes to form a clover. Tape it
together and trace this new shape.
**As a side note here, you could skip the dividing and cutting steps by tracing four petals of the flower in an "X" shape. But dividing and cutting helps you move the petals around without having to repeatedly erase.

Cut it out and you have your third four leaf clover!

Now that you have three clovers, they will stack together to make
layers. You can also use the arrow shapes from various template sets
to add a stem.

Ready to add a variation? Let's make them into three leaf clovers!

This one's pretty self explanatory - Just cut one petal/leaf into a stem as you see in the pictures.

These three leaf clovers also layer onto each other and make the perfect addition to a card.

I always try to step out of the box when I Play To Create with my Designer Templates! I love challenging myself to use them in new and unique ways. I hope you enjoyed stepping out of the box with me!

Thanks for stopping by, and don’t forget to share your own out-of-the-box template projects!!


Here are the Templates that I used:
Sweetheart 1,2,3
Tiny Sweetheart 2T,3T
Springtime 5
Mini Aspen Court 2A

Paper collection:

Lucky You by Echo Park

Thursday, February 11, 2016

Valentine's Day Cards with Kiwi Lane Designs

Hello again! I know what you're thinking- two blog posts in a month?! And within 24 hours of each other, no less! I know... don't faint. ;) 

Today, I have a few Valentine's Day cards to share with you, along with a little tip that you can use for any theme- it will work for any of the templates! First off, here are some Valentine's Day cards:


Do you see how there are shapes of white on the background on both cards? That was made by laying Kiwi Lane templates on plain white paper and spraying ink all over the paper. On the "XOXO" card, I left the white background shape untouched and layered some hand cut template shapes on top.  Here's the step by step:

1) Lay templates on the paper where you want them and spray with ink, essentially using the templates as a resist.

2) Let ink dry for a minute and carefully remove templates. (Wash templates under water to remove ink. It should come right off. If not, try washing with a mild soap.)

3) When paper is completely dry, layer smaller templates.

4) Trace, cut, ink and replace to get your card!

There are a few things to point out about this card:
-I originally used a white card base. I decided to cut it down to the piece you see on the front of the card because it warped a little more than I liked. It was an easy fix- you can do the same if you feel like you don't like the way your spray ink warped your paper.  
-I forgot to cover the hole on the template with a little bit of tape before spraying the ink. This made a little dot of color that I didn't really want. I was able to cover it with the layered shape on top, but you might want to cover the hole before you spray your ink. ;)

While the "XOXO" card has plain white resist shapes, I decided that the "Head over Heels" card needed some doodling around the resist shape. I also doodled around the smaller shapes that I layered on the card.

And just because I can, here's another card for your viewing pleasure... and hopefully some template inspiration:

There you go- three cards to help you show some love! I hope you enjoyed them- leave a comment and let me know what you think!

Templates used:
Adorn 2A,2B
Sweetheart 2,3
Tiny Sweetheart 2T,3T
Tiny Accents 1T
Tags 1
Tiny Tags 1T,6T
Tiny Nature 1T

Wednesday, February 10, 2016

Valentine's Day Decor with Kiwi Lane Designs

Hey there Kiwi Lane Peeps!

Today I've veered from my normal paper crafting and ventured into the land of wood blocks! Ok, so it's not so unusual, but I don't usually share it here. But I loved how they turned out, and I thought you might like to see it. Here's what I made with the help of my templates from Kiwi Lane Designs:

Pretty cute, huh? All I did was paint some wooden hearts, cover with paper, add some template shapes and finish off with some epoxy dots of various colors and sizes. It's really pretty self explanatory, so I'll let the photos speak for themselves. Mostly.

Here's what I started with:

The paper collection I used is called "Kiss Kiss" and it was Crate Paper's Valentine line a few years ago. The hearts are cut out wood shapes that I picked up at the farmer's market over the summer. They're about 4.5" tall and 4.5" wide and just under 1.5" thick. Before I painted, I made sure I sanded them lightly and wiped off any sanding residue. You'll get a cleaner paint application if you remember to do that.

I also want to point out that I framed my project right on the wood shapes. Who says you can only use your Kiwi Lane templates to frame on your paper?! And just like when you design on your pages or cards, you can change things as you go without ruining pretty paper in the process!

I love the size and configuration of these hearts because you can mix it up when you display them:


And I covered the back with paper so it's pretty from the other side, too.

Looking at the bare paper on the back, I'm thinking I need to go back and add some more layers...

Thanks for taking a look! Leave a comment and let me know what you think!

Templates used:
Tiny Sweetheart 2T,3T
Tiny Explore 3T,6T
Mini Abbie Road 3A,3B
Elements 2,7

Friday, January 29, 2016

Winter Layout with Kiwi Lane Designs

Hello, Hello!!
Happy January! I'm sure you've made (and possibly broken) your resolutions by now, but did you make one that had to do with getting your scrapbooks done? Well, hopefully I can help inspire you today and get you on your way to meeting your goals! 

First of all, I used some of January's featured templates on my layout, plus a few extras. And the paper line I used was called "Snow Fun" by Pebbles, Inc. and I'm pretty sure it was released circa 2008/2009. Yes, I know. I'm a paper hoarder. Admitting it is the first step... to the craft store to get some more paper. Haha! Anyway... Here's what my layout looked like when I started framing using my Kiwi Lane templates:
I know you can't really see the framing. It's what happens when you are trying to take a photo of framing on a white background after midnight under fluorescent lighting. You get the idea, though. And, of course, the original framing is not exactly what I ended up with. I added a few more templates, plus some punched snowflakes.  Here's what the finished product looks like:
Supplies: card stock, glitter glue, chipboard (American Crafts); patterned paper, die cut, letter stickers (Pebbles, Inc.), brads (Creative Impressions), vellum (Provo Crafts); pen (Staedtler); ink (Ranger); punch (Marvy Uchida); Kiwi Lane Designs templates

If you haven't figured this out yet, I love, LoVe, LOVE using vellum and glitter on winter layouts! They add layers and texture without a lot of bulk, an they mimic the look of ice and snow. So what happens when you combine the two? You get a little bit of warping. Not great, but not horrible either. In fact, it adds another layer of texture to your layout. If you look at the finished layout, you'll notice that the vellum ice crystal shape is outlined with glitter glue and it's warped it so it curls off the page a little bit. It will get pressed down when put in a page protector, so not a big deal. My punched vellum snowflakes didn't fare so well when I added some glitter glue- they warped a LOT!! I put the glitter on them and went to bed. I awoke to this:
Warped and curled and not willing to flatten out at all!! So what do you do when you need to flatten your crafting project quickly? You grab your super small crafting iron, of course! I put the snowflakes between the folds of a kitchen towel and ironed (crossing my fingers because I hadn't actually ever ironed vellum before and I didn't know if it'd work). And it worked!! Here's a before and after:
And just because I know you're going to ask, here's the super cute little crafting iron I used:
It's the size of your palm, plugs into the wall, only does dry heat and doesn't have holes on the face of the iron. It's a great little tool!

Thanks for stopping by and checking out my layout- Happy Scrapping!!

Templates used:
Mini Aspen 1B,3A
Winter 1,2
Tags 1

Merry and Bright Paper Kit with Kiwi Lane

Hello again!  I'm so excited to show you a layout I made using Kiwi Lane's newest paper kit "Merry and Bright."  And can I tell you how much fun I had working with this kit?!  I know when you look at the photos for some of the projects made from the kit, the red looks a little orange-ish. But when I had the paper kit in my hands, I was happy to see that the red is a rich, beautiful Christmas red. And the color combination in the kit are perfect for anything Christmas, holiday or winter related!

Here's the layout I made using my Kiwi Lane Merry and Bright paper kit:
Supplies: Merry and Bright paper kit and designer templates (Kiwi Lane Designs); glitter, twine, glitter tape (American Crafts); ink (Ranger); pen (Staedtler); brads, tape (craft supply)

I totally forgot to take a "before" photo with my page framed and ready to go... Sorry! Next time, for sure!

The photos on this layout were take a few years ago when my family and I visited Temple Square in Salt Lake City to see the lights. It was a beautiful night and perfect for wandering around enjoying the displays. If you've never been, and you're a fan of holiday lights, you should totally go! It's quite the sight!!

Soooo.....Did you see the cute little details on the Tiny Traditions mitten and light bulb shapes? Here are the mittens:
I made the cuffs look furry using double sided tape and tinsel glitter.  Fun effect, yeah? You can still see just a hint of the pattern on the paper (it's gray polka dots on a white background) under the translucent glitter. Well, you can see it in person. Not so much in photos.

And here is one of the light bulbs:
I used silver washi tape to cover the end and tied some white twine around it to finish it off. I also ended up fussy cutting some of the circles out of the snowflake paper to make my grouping look more complete.

The title area features more light bulbs and looks like this close up:
I know I've mentioned this in previous posts about the Kiwi Lane paper kits, but I'm going to have to do it again. It bears repeating. The printed elements paper is fantastic! I love that it has a few titles, sentiments, journaling spots and some smaller areas of various patterns that you can use to add to your layers. It's basically like they've combined a title pack, journaling pack and 3 extra sheets of paper (you know, those sheets that you only need a little bit of but you have to buy the whole sheet to get?) all in one handy printed piece of awesomeness! I'm telling you- it's GENIUS!!

So that's it. I'd love it if you'd leave a comment at the bottom of this blog post. It's always nice to hear from you!! 

Templates used:
Sunnybrook Lane 1A,1B,2A,2B

Friday, November 6, 2015

A Layout and a Few Cards with Kiwi Lane

Hello fellow Kiwi Lane fans!  I have a few things to share with you today. And to continue with my theme from some of the last few posts I've done, I used another fabulous Kiwi Lane paper kit to create a single page layout and a few cards, along with this month featured templates- Brackets, Adorn and Autumn.

I used Kiwi Lane's "Social Butterfly" paper kit this month. I have to admit- when I saw this collection, I thought it was going to be way too girly for me to do use very well.  Especially with the Autumn template set.  I mean, it has pink, flowers and butterflies!  BUT, I should have known better!! These Kiwi Lane ladies are genius and know how to make a paper kit so that you don't have to use the girly elements in a way that overpowers the page. Instead, you use the reverse side and smaller pieces of those prints that scream GIRLY GIRL.  And you end up with a project that is just feminine enough without jumping out at you with a tiara, tutu and sparkly wand. I'm telling you, it's pure genius!!

So here's the layout I ended up with:
Supplies: Kiwi Lane's Social Butterfly paper kit; alphabet stickers (American Crafts, Making Memories); ink (Ranger); pen (Staedtler)

And here's how I "Framed" my layout:


Yes, that is a grand total of three templates on my layout.  I had no idea what I wanted to do with the layout when I started.  So I threw on a few templates from the Adorn template set, along with a template from the Bracket set and built my page from there. I added lots of layers of the scalloped edge and mirrored that at the bottom of the page.  I also used one of the printed quotes from the paper kit and added that early on to make sure I left room for it.  I finished off the page with a butterfly from the Tiny Nature set and a few flowers from the Tiny Wildflower set and a title using some alphabet stickers.  

With some of the remaining paper from the kit, I made some cards:
Supplies: Kiwi Lane's Social Butterfly paper kit; card stock (American Crafts); pen (Staedtler); ink (Ranger); stamp (Basic Grey); jewels (craft supply)
 Supplies: Kiwi Lane's Social Butterfly paper kit; card stock (American Crafts); pearl (Doodlebug); brad (American Crafts); ink (Ranger)
Supplies: Kiwi Lane's Social Butterfly paper kit; card stock, alphabet stickers (American Crafts); pearls (Doodlebug); ink (Ranger); pen (Staedtler)


The "Hello" card has a shaped edge and some detail on the inside:


Even after making a layout and a few cards, I have enough scraps of paper left to make at least a few more cards. I love how much you can do with each Kiwi Lane paper kit!

Thanks for stopping by and Happy Scrapping!!

Templates used:
Bracket 2
Adorn 3A,3B,1B
Tiny Nature 2T
Scallops 1B
Wildflower 1T,4T
Autumn 1,3,6
Springtime 2
Mini Scallops 2A